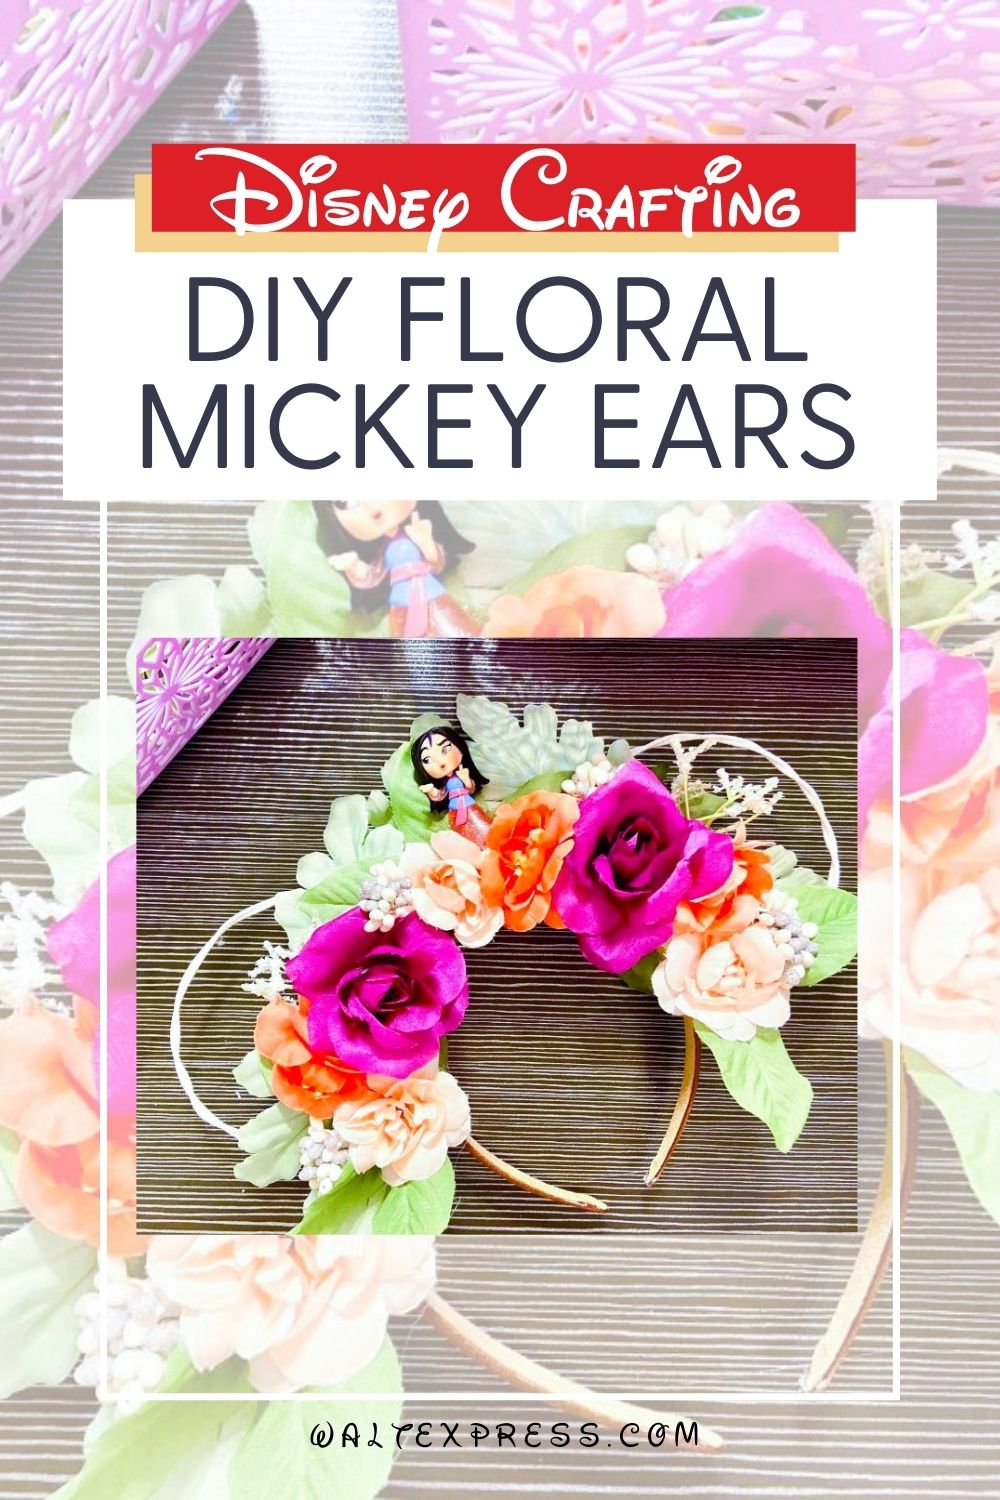
How to Make DIY Disney Floral Ears!
Today, I am so pumped to share a fun DIY Disney Floral Ear tutorial from my friend, Carrie.
Grab your craft supplies and then craft along with her video as she shows you how easy it is make your very own custom DIY Disney floral ears – even if you don’t think you’re very crafty! These are super cute to wear whenever you’re feeling fancy, but also perfect for the Epcot Flower and Garden Festival. Can’t you just imagine posing amongst the Mickey topiaries in these?
DIY Disney Floral Ears
Are you as obsessed as much as I am with the new trends of Disney floral ears? As I spend hours pining over Etsy and feeling like I could easily be on an edition of Hoarders: Disney Ear Edition, I finally broke down and decided to make my own.
After all, there’s no need to go broke just because you, like me, MUST have every variation of floral ears there is in existence.
Floral Ears Supply List
Thankfully, making your own ears is fairly simple. All you need are a few basic supplies:
- Thick Headband – You can use one you have already, or grab two for $1 at Dollar Tree! Of course, they can be found almost anywhere including Amazon too.
- Bendable Wire – You’ll need 4 pieces of this. It can be any color you’d like. I use floral wire, which can be easily found at any craft store.
- Wire Cutters – Take it from me, you’ll need these! Scissors won’t really work with cutting wire, especially if you bought a thicker wire.
- Fake Flowers – You can get these anywhere. I suggest a few different colors and not too large ones!)
- Hot Glue and Hot Glue Gun
Steps to DIY Disney Floral Ears
- Grab two pieces of wire and hold them together with ends aligned. Then, twist them together from one end to the other.
- Cut the wire down to about inches – this is your first ear.
- Then, repeat with another 2 pieces of wire.
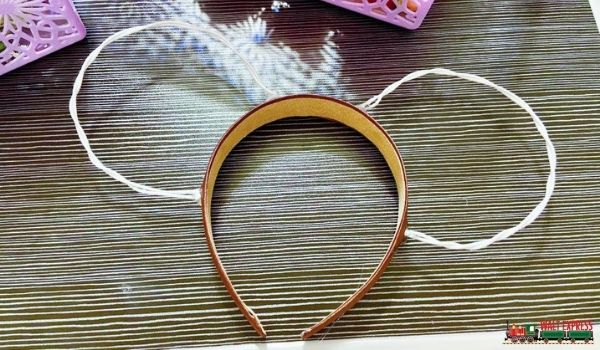
- Bend each twisted wire over the top of your headband…this will form the rough shape of your mouse ear.
- The easiest way I’ve found to do this is to hot glue one end of the twisted wire at a time to your headband. Make sure to leave a space in the middle of the ears that’s about 2″ wide.
- Then, glue all remaining ends of the ears onto the headband. Don’t worry about what the glue looks like…it will be covered by the flowers!
- Speaking of, now it’s time to add those pretty florals! Pop off the tops of your faux flowers. Make sure to pull or cut off some of the greenery as well.
- Next, use glue to add the green leaves to the middle of your ears. I also recommend adding some around the base of the wire.
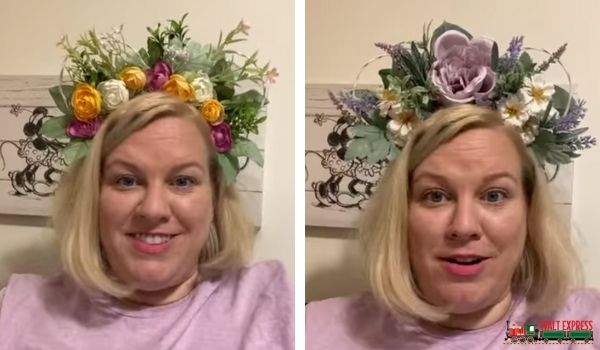
- Now it’s time to add the flowers. Pro tip: before gluing, arrange your flowers on your headband first. Once you’re happy with how they look, then go for the glue.
- Check the back of your headband too. You may want to glue in leaves to cover any exposed pieces. You can even add flowers on both sides so you can make a reversible set of DIY Disney Floral Ears
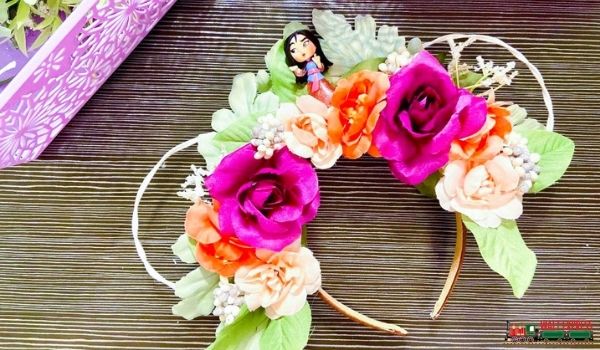
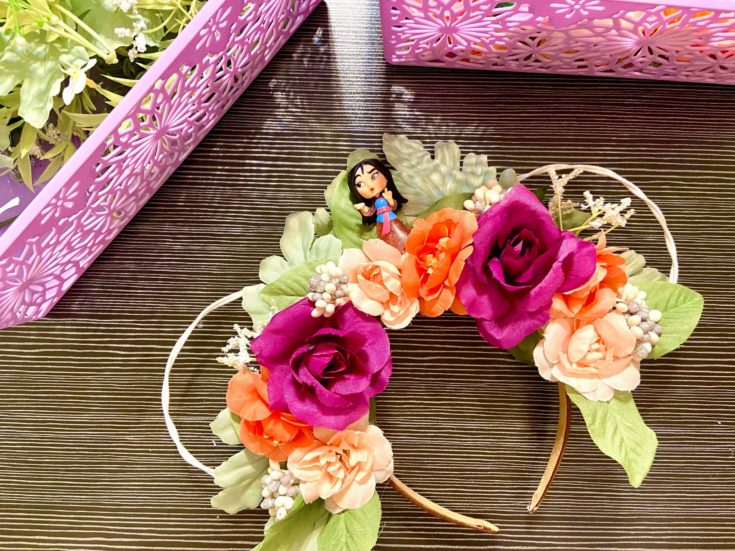
- Want to take it up a notch? Add in a mini figurine if you would like to create a theme to your DIY Disney Floral Ears!
Thank you for crafting with me and let us know if there are any crafts you would like to see in upcoming blogs! See you in the parks!
For more amazing Disney information, head over to Disney Express Lane. Take a peek at these Four Things I Will Never Do At Disney Again. Plus, make sure to check out these 7 Disney-Inspired Crafts!
DIY Disney Floral Ears
This DIY Disney floral ears project is the cutest! Learn how to craft one up for yourself.
Materials
- Thick headband
- Bendable wire (such as floral wire)
- Fake flowers
- Hot glue
Tools
- Wire cutters
- Glue gun
Instructions
- Take two pieces of wire and twist together from one end to the other.
- Cut wire to ~8 inches
- Repeat with other 2 pieces of wire. Twist and cut.
- Bend your wire over the top of your headband to form the rough shape of your mouse ear.
- Hot glue one end of the twisted wire at a time to your headband leaving a space in the middle of the ears 2-3 fingers wide.
- Glue all remaining ends of ears onto headband.
- Pop off the tops of your fake flowers and take the greenery off as well.
- Use glue to adhere green leaves (on their side) to the middle of your ears, followed by some around each base of the wire.
- Before gluing, arrange your flowers on your headband and when you are happy with the desired look, glue them in.
- Go to the back of your headband and glue in leaves to cover all of the "behind the scenes" glued in pieces. OPTIONAL: You may add flowers on both sides if you want a reversible set of DIY Disney Floral Ears!
- Glue in any sprigs or extra pieces to add depth to your new ears.
- OPTIONAL: Add in a mini figurine if you would like to create a theme to your DIY Disney Floral Ears!
Ready to plan your magical vacation? Go HERE for a FREE quote!
- Post may contain affiliate links.
Welcome to WaltExpress.com! Check out our most popular posts while you are here, located in the sidebar and you can "like” our Facebook page here and receive new posts in your news stream. Thanks for visiting!

Carrie Dostie
Latest posts by Carrie Dostie (see all)
- How to Make DIY Disney Floral Ears! - June 21, 2021
- Hello Spring With A Disney DIY UP Inspired Easter Basket - March 30, 2021


GetDeals, Tips, and Updates Delivered to Your Inbox!
Bibbidy Bobbidy Boo, you're in! Check your inbox for a special message from us!